Installing a graphics card on a new PC or replacing it with the old one for the first time can seem daunting, but not with this guide. The process is quite fun and easy to do if you follow all the safety measures and instructions properly.
Steps can vary for new installation and replacing old graphics cards, and I have covered both in this guide. If you still need to purchase your GPU, ensure that it must be compatible with your motherboard and PC case size. And now, let’s dive directly into the process.
Prerequisites
Before installing a new graphics card on your system, here are some crucial things you must keep in mind:
- Turn OFF the system and discharge the static by pressing the power button for 10-15 seconds before opening the PC or touching its components.
- Use an appropriate screwdriver and wear an Anti-Static band to prevent any electric shock.
- Ensure the PSU can provide enough power supply to the new GPU to avoid short-circuit or irreversible damage. Ideally, the power supply must be graded twice the GPU power consumption.
- If you wish to mount your graphics card vertically on the motherboard, ensure it fits your PC case perfectly. Also, it must be able to work with other PC components to avoid bottlenecking.
- Also, look at which type of PCle connectors (6-pin or 8-pin) your PSU has and how many, so you don’t have to buy additional adapter to connect your GPU to PSU.
How to Install GPU on a New PC
Installing a new graphics card on the motherboard is pretty simple, even if you are doing it for the first time. You just need to follow these steps:
1. Shut Down Power Supply for Your PC
Before opening your PC case to install a GPU, shut down your PC. Turn off the switch on the back of your computer to turn off the PSU and discharge the static.
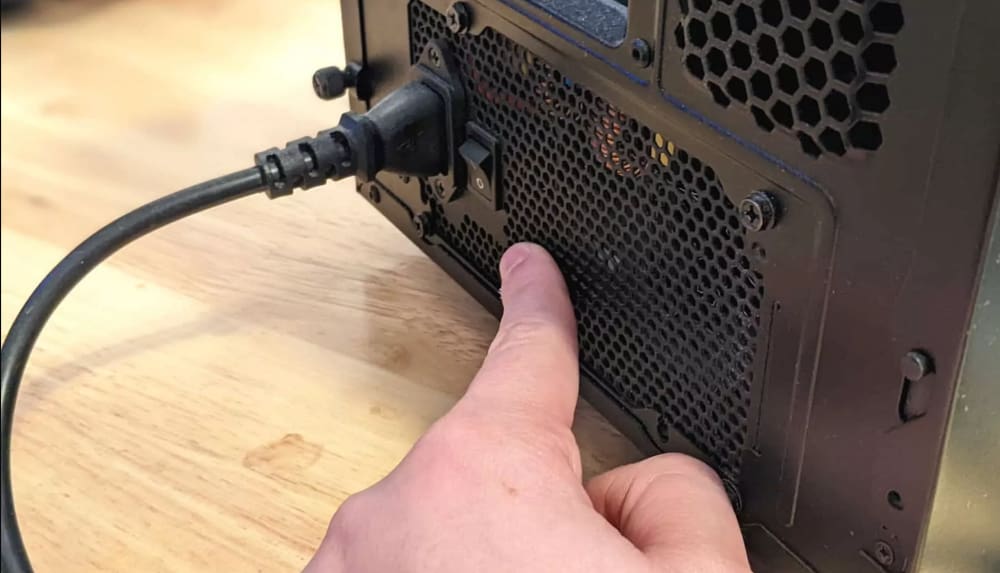
Unplug power cord from main supply and remove all other cable connections.
Ensure that the PC is on a non-conductive surface and you are wearing an anti wrist band to avoid electric shock.
2. Open Your PC Case
Locate the screws of your PC’s side/back panel and unscrew them with a screwdriver (if don’t have thumbscrews) to open the case. If there are no screws, you can open the PC case by sliding it off.
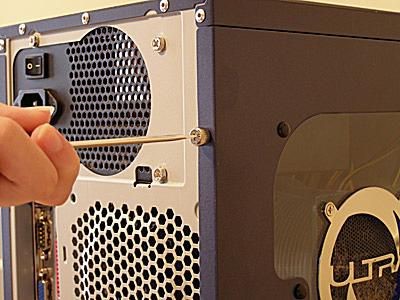
3. Remove Metal Plates Covering Expansion Slots
On the back of your computer, you can see some small metal plates covering the expansion slots corresponding to empty PCle slots. To insert your graphics card in that slot, remove those metal plates by unscrewing their screws.
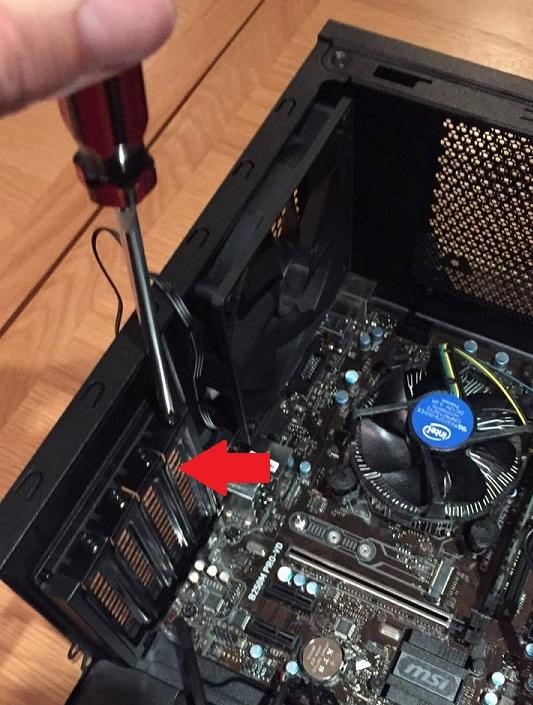
As there are multiple metal plates, you can hold your GPU card in its empty PCle slot to check plates are coming their way to get removed.
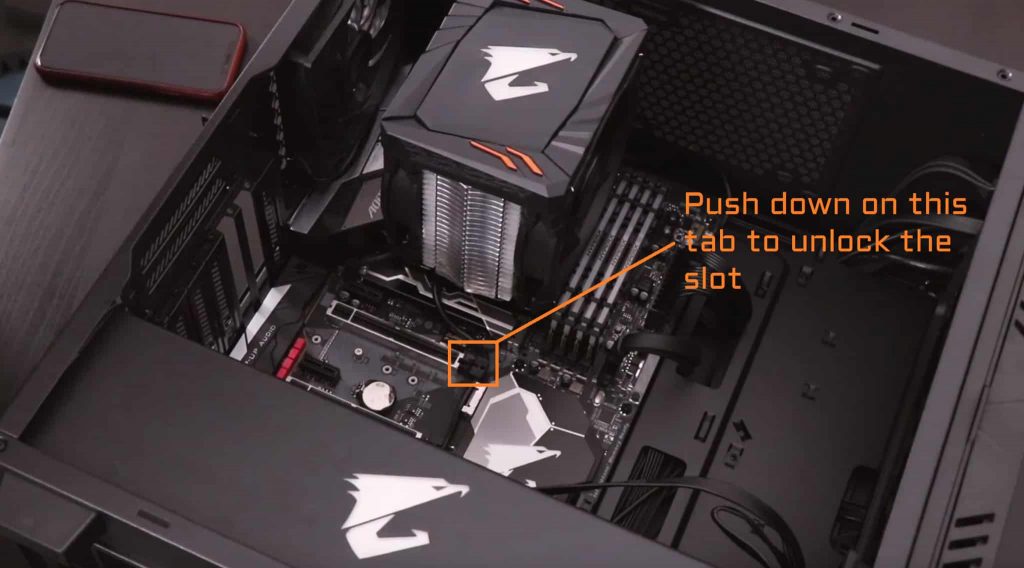
4. Unlock PCle Slots
Now, before inserting the graphics card in the empty PCle slot, ensure the latch/lock is open. To unlock it, either press the lock downwards to release it or push it to the side (depending on which type of latch your motherboard has).
5. Install Your Graphics Card on PCle Slot
Line up the metal pins on a graphics card with an empty and primary PCle x16 slot on the motherboard so that the metal plates on its I/O fit perfectly on the edge of the motherboard.
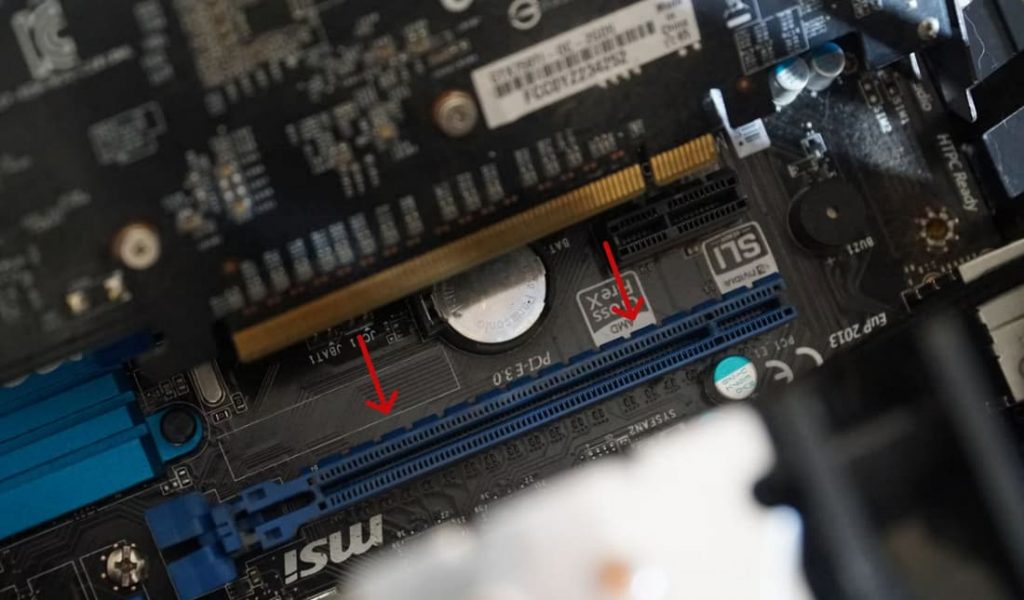
Once your GPU is in the right position, gently put the card all the way down without applying too much pressure. Once the card fits in its PCle slot perfectly, you will hear a clicking side indicating the PCle slot is closed.
To secure your graphics card firmly in its position, reinstall the screws you took off from the empty backplates of expansion slots. The screws will be used this time to hold your GPU in place.
6. Connect with PSU Connector
The power-hungry graphics cards come with an additional power connector plug in them where you can connect power cables from PSU to provide additional power. If your GPU has any such power connector (6-pin or 8-pin) on it, locate the power cables on your PSU and attach them swiftly into the connector, else the graphics card will not work.
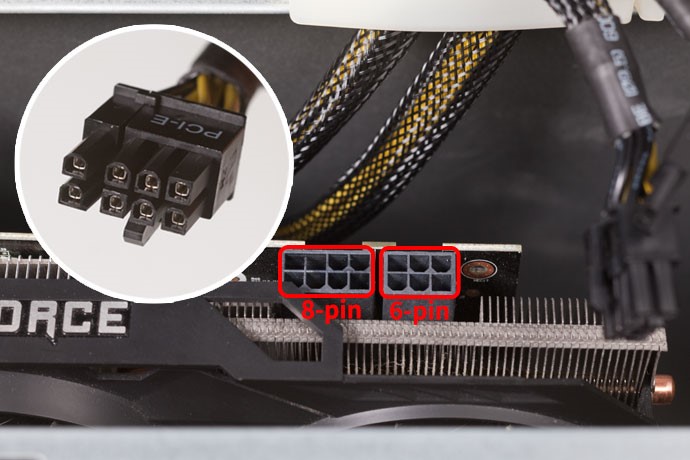
Note: On your PSU, you can find 6+2 plugs to connect with both 6-plug and 8-plug connectors. If connecting them in an 8-pin connector, first connect the 2-pin plug followed by the 6-pin plug for ease.
7. Reassemble PC and Connect Monitor to GPU
- After attaching everything, reassemble your PC case.
- Connect your monitor to the GPU via the appropriate port (HDMI, DisplayPort, VGA or DVI) on the PC’s back panel. For the best graphics quality, use HDMI and Displayport. If your motherboard lacks them, use VGA or DVI.
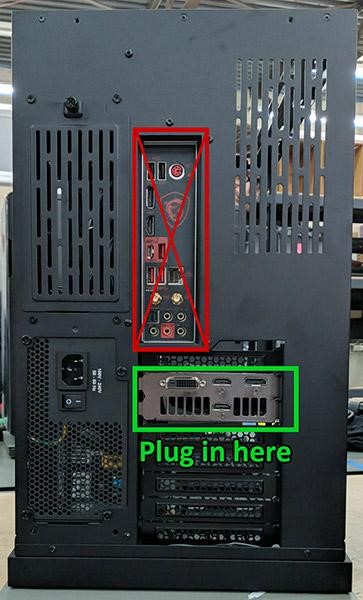
Note: Ensure you connect the Monitor to your GPU and not the motherboard to avoid the blank screen.
8. Reboot Your PC
After establishing all crucial cable connections, reboot or start your PC. If your PC is not starting or getting a blank screen, ensure that all cables are connected properly, and the graphics card is placed correctly into the PCle slot.
9. Install Necessary Drivers
Once your PC is working fine, install all the necessary drivers compatible with your graphics card to get the best resolution. Drivers are crucial to let your GPU communicate with the OS properly when running graphics-intensive titles or apps without the system crashing.
Either use the instructions mentioned on the GPU manual to install drivers or follow any of the links (depending on which GPU you have) to install the necessary drivers on your system:
Putting a New Graphics Card in an Old Computer
The installation part for replacing the existing graphics card with a new one will remain the same. However, here are some additional steps you must perform before installing a new GPU in that case:
1. Uninstall all Old Graphics Card Drivers
If you are switching the GPU manufacturer (from AMD to NVIDIA or vice-versa), you need to first uninstall all the old drivers to avoid incompatibility issues.
You can either use Display Driver Uninstaller to automate the process or do it manually by following these steps:
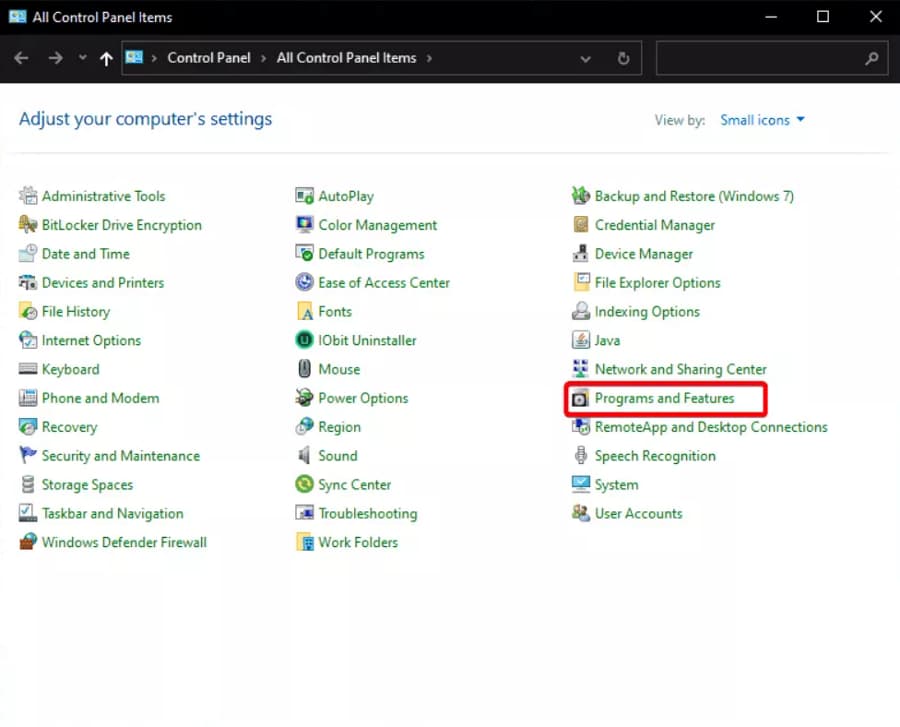
- Go to your system’s “Control Panel” and click on “Programs and Features”.
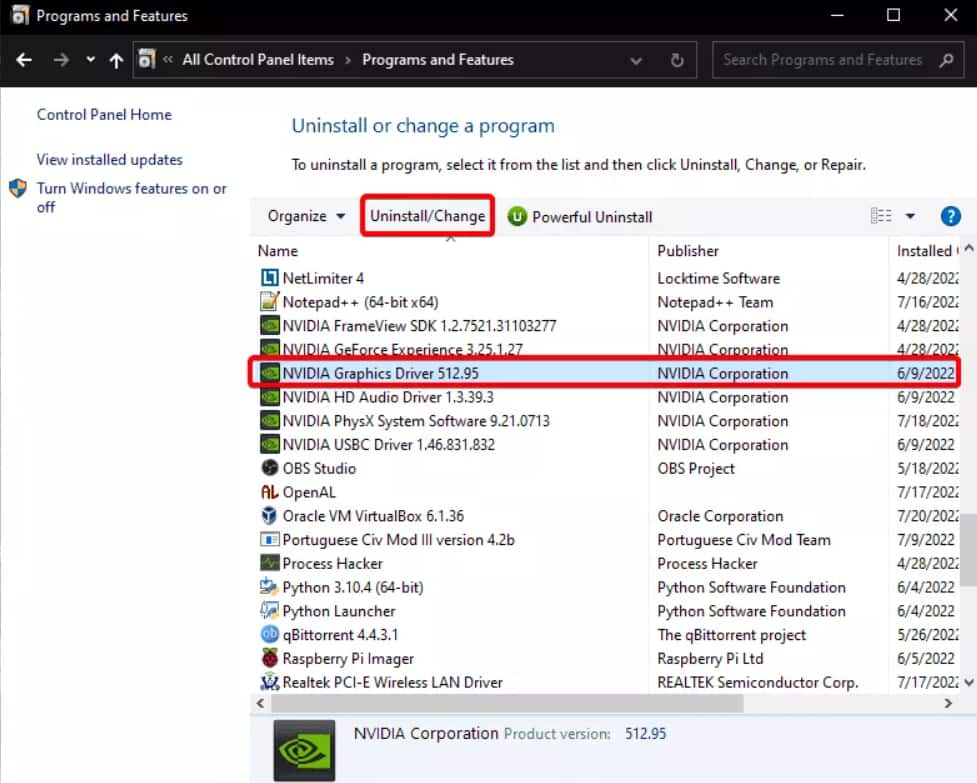
- Search for NVIDIA or AMD drivers (depending upon your GPU manufacturer) to access them. Select all the drivers and uninstall them. Once it is done, you can shut down your system, drain its power and open the case (referring to the steps mentioned above) for replacing the GPU.
2. Remove the Old Graphics Card & PCle Backplates
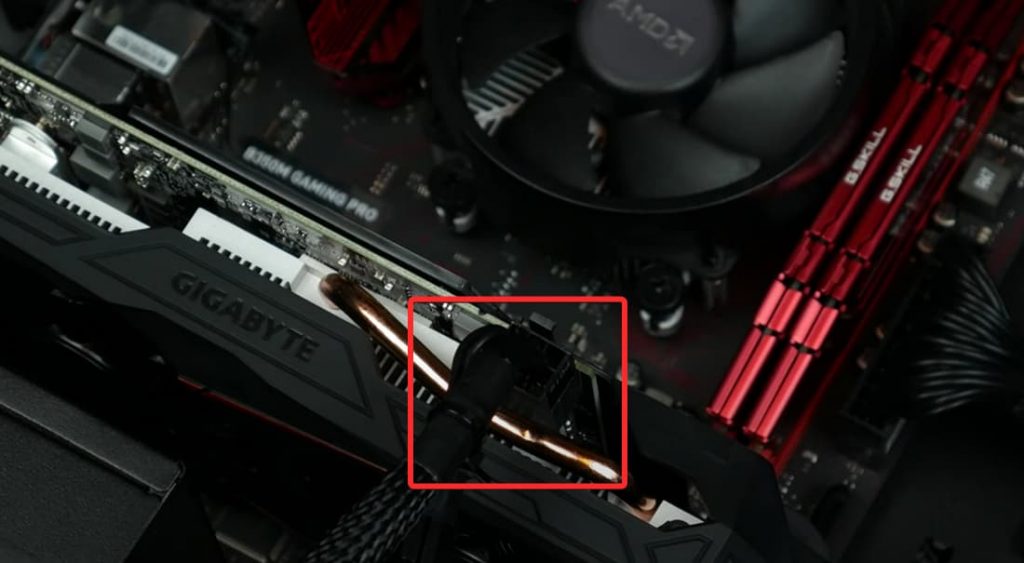
- To remove the old GPU, first, unplug the power cable attached to its rear end by pressing the push-pin with enough pressure.
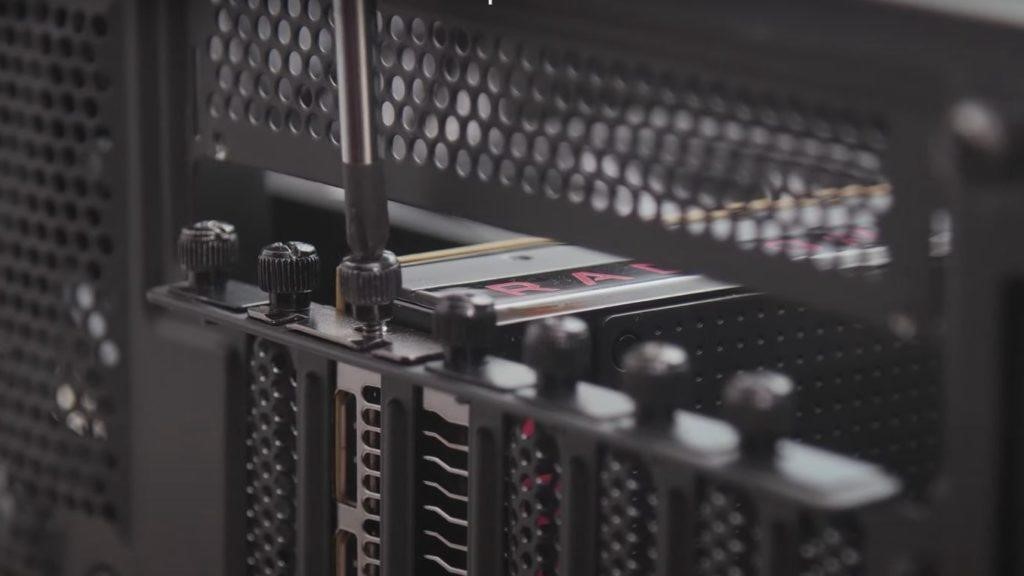
- Now remove the screws on the backplate holding the graphics card using the screwdriver. Use your hand in case of thumbscrews and keep them safe for reassembling later.
- Unlock the latch at the end of the PCle slot underneath the card. Before pulling out the card, ensure it is fully relaxed so you won’t damage its pin or anything.
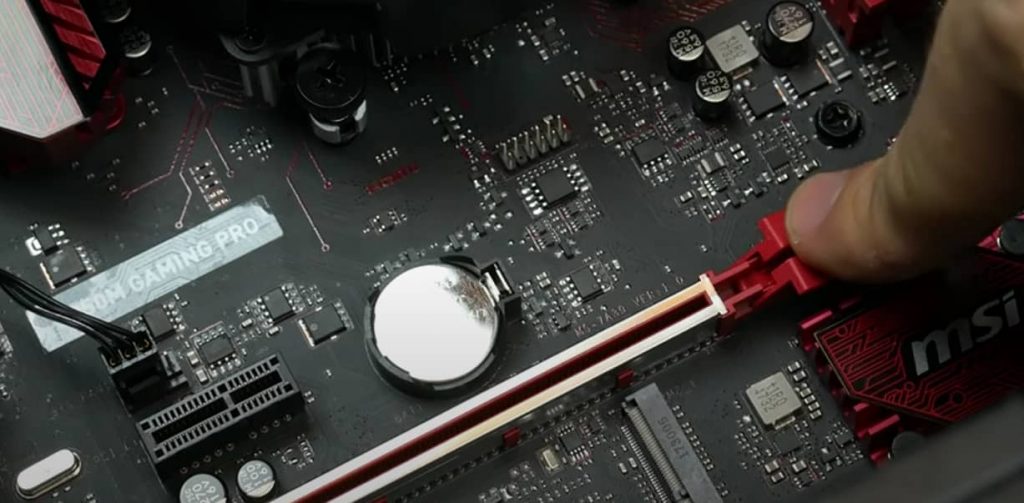
- Gently pull it out and place it in an anti-static bag or on a non-conductive surface.
- If you think your new GPU is bigger than the old one and requires more space, you can remove one or more backplates (referring to the new installation guide above) to make enough space.
3. Install a New Graphics Card
After the PCle slot is empty, wipe it gently with a cloth to remove dirt before installing a new graphics card. All the steps of installing a new graphics card and testing it will remain the same as in the above guide.
Frequently Asked Questions
The graphics card slot (also known as the PCle x16 slot) is located in the expansion slot closest to the CPU on the motherboard. There can be more than one expansion slot, so you must use the primary PCle x16 slot for GPU, while the other can be used for secondary GPU or other components’ expansion.
If the display works fine after GPU installation, it is placed correctly. To get further information on your graphics card, check details under the “Advanced display settings” of your system’s settings.
Yes, ideally, you should always place the graphics card in the primary PCle x16 slot for full performance as it is closest to the CPU and thus can offer the highest throughput.
Yes, if your graphics card model is new, you must update the drivers regularly to get faster and better performance without any bugs or glitches.
Conclusion
This is how you can easily install a new graphics card on your new or old PC. Ensure your GPU is compatible with PSU, motherboard and other components to avoid bottleneck and incompatibility issues. You can check online benchmark scores or try some graphics-intensive titles at higher settings and frame rates to test your graphics card performance.
